Onstream Webinars Best Practices
This document provides a list of best practices you should follow when conducting a meeting or webinar using the Onstream Webinars platform. Following these best practices will ensure a positive experience for both the host and their participants..
IMPORTANT: Make sure to close out of ALL applications aside from what is needed for the session, when using any of the following features: webcams, VoIP, teleconference audio line, rich media playback (including videos and audio) and screensharing. Any applications that will be shared can remain open. Those that aren’t should remain closed to free up CPU resources for an optimal experience.
Additionally, you should remind all meeting participants to do the same.
Enabling audio and video features within session:
- When using the VoIP feature, try to use a headset. This will help in preventing audio feedback.
- If you cannot use a headset for VoIP, always use earbuds and turn off AEC and AUTO GAIN (manually set volume to something like 90%). This will take a big load off the CPU and allow for more power to go to video and screenshareing.
- Use a computer with a direct LAN line (Ethernet) connection rather than WiFi, for maximum video/audio and screen sharing quality.
- Always use a HD Logitech webcam. Integrated webcams can sometimes look washed-out and unsaturated (even integrated cams on Mac laptops).
-
Try to limit having your webcam and microphone on, when not actively being used. To do this click on the icons to disable.

-
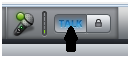
Have participants that are using VoIP, use the “Click to Talk” option rather than having their microphones always on. (To do this, unclick “Lock” next to the Talk button so that it is grey instead of blue, and then hold down the “Talk” button when speaking.)
- As a host, if you wish to have your profile photo display (rather than active video) during a webinar, turn your webcam on and then off. (Please note: This will require a profile photo to already be uploaded and saved in the My Profile section of the dashboard.)
-
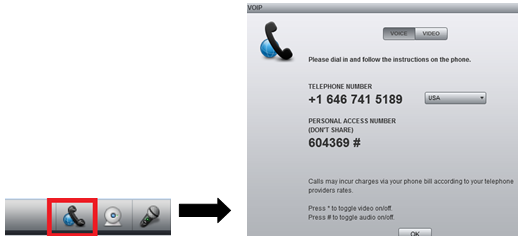
You can also enable the Teleconference option during event creation, to allow for a US Toll based audio dial-in, which can stream to participants’ computer speakers.
-
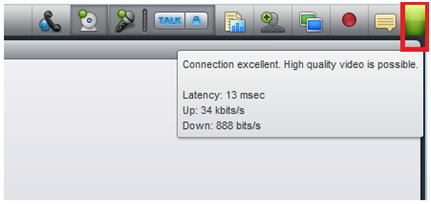
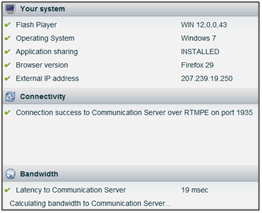
Run a quick speed check just before the demo to make sure all is OK on your end. We recommend http://www.speedtest.net/ Also, if you are in a session, you can check your connection speed by hovering over the green/orange/red box in the top right corner of the webinar player. Please note: Each individual user has the exact same bandwidth requirement of upload 256kbps and download 5*256 = 1280kbps. A host requires an upload speed of at least 500kbps, if using VoIP, a webcam and screen sharing. The hosts requires a download speed of 500 Kbps per connected broadcaster, for example: 5(including host)*500kbps= 2500kbps.
-
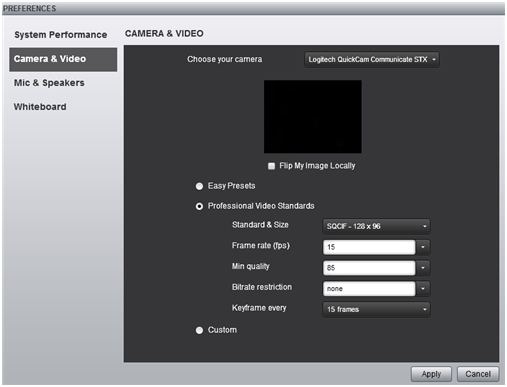
In the Video Settings panel, try not to go beyond 480 pixels wide and no more than 15 to 20 fps.
Managing standard features within a session:
-
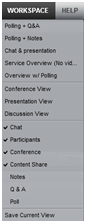
Save the session layout by clicking “Save Current View” under “Workspace;” once you have adjusted modules into a custom layout that you like.
-
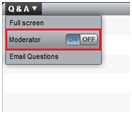
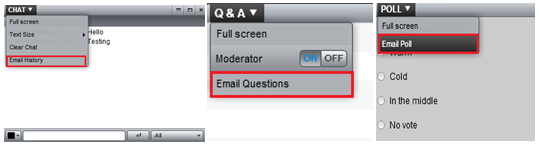
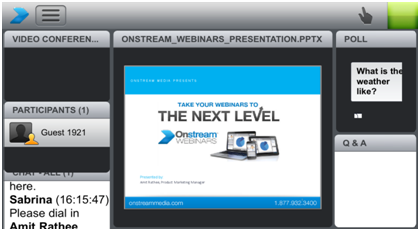
The Q&A module allows you to switch between the participant and moderator view by clicking on the top left corner of the Q&A module and toggling “Moderator” on and off.
-
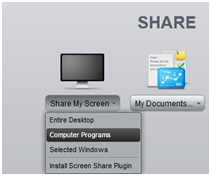
If you plan on focusing primarily on screen sharing for your event, enable screen sharing prior to the start of your meeting/webinar, in order to prevent unneeded delay.
-
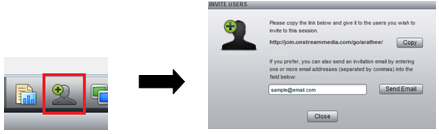
As a moderator you can invite participants to your session directly from within the webinar player. To do so click on the “Invite Participants” icon and type in the email-address for the user you wish to invite.
-
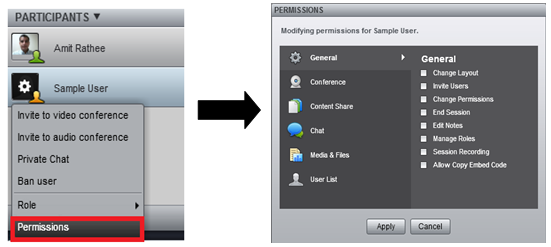
As a moderator, micromanage user permissions by clicking on their avatar and then “Permissions.” You will be able to enable individual features rather than granting full moderator control to your participants.
-
Public chat, Q&A, and polling results can all be emailed independently to an email of your choosing by clicking in the top left corner of each respective module and choosing the email option. (Please note: Information in these modules will not be saved automatically, and will need to be emailed if required for records.)
-
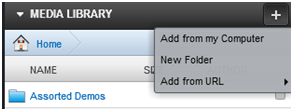
It is recommended that you upload all content including word documents, PowerPoint presentations and PDF files prior to the start of your session to allow time for file conversion.
Managing standard features within a mobile session:
-
Use landscape mode for an optimal experience.
- When connecting to a meeting from a mobile device, make sure to copy and paste the session URL from your invitation email, instead of manually typing it.
- When attending a session from a mobile device, try to make sure you are on WiFi rather than 3G, to ensure the best possible streaming quality. (Please note: We cannot guarantee full functionality of audio or video quality on non-WiFi connections.)
- If you are planning on presenting from your mobile device, prepare the room via a desktop computer by loading the PowerPoint presentation or other materials you wish to share. (Please note: You cannot access the media library from a mobile device for security reasons.)
-
All webinar player modules can be individually maximized and then resized for an optimal mobile experience.

Session creation within the Account Center:
Branding:
-
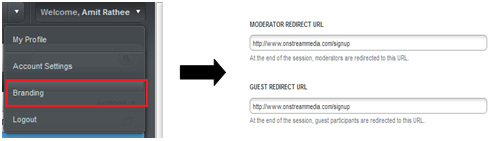
Customize your ‘end of session URL redirect’ for both moderators and participants under “Branding” in the dashboard.
-
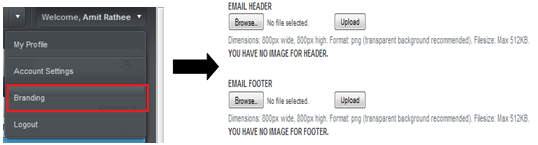
Add custom headers and footers to your invitations and reminder emails under “Branding” in the dashboard.
System Check:
-
Advise all participants to run an Onstream Webinars system check prior to joining or hosting a webinar (http://join.onstreammedia.com/systemcheck) and always make sure everyone has a relatively up-to-date version of Flash.
Scheduling:
-
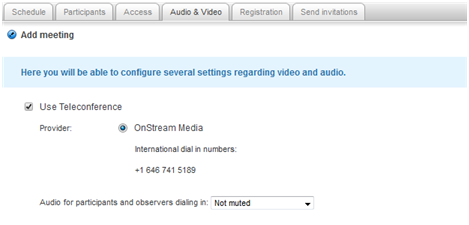
If you plan on using the toll based teleconference line, check off “Use Teleconference” under “Audio & Video” in advanced options. Please note: You will also be able to set the default setting for participants dialing in to “not muted,” “muted with the ability to unmute” and “muted without the ability to unmute.”
-
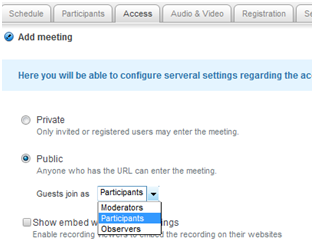
Using the Access tab, you have the ability to set your event as public or private and designate if the guests will join as participants, moderators or observers.
-
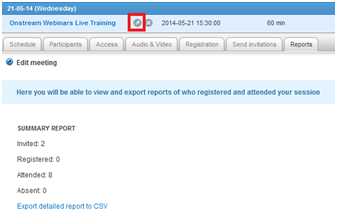
Once a user has filled out the registration page or a meeting has been completed, if you click on the edit meeting option there will be a new “Reports” tab. This will allow you to export your meeting specific report including registrations and attendance records as a CSV file.
-
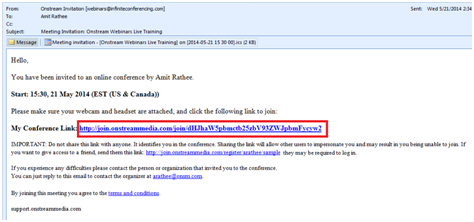
If you invite a user, or they register for your event via the customizable registration page, they will receive an email with a unique link to join the session. This should be used only be participant that was invited, as it is user-specific.
-
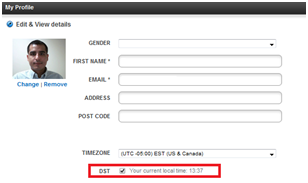
If you are having difficulty displaying the correct meeting status on your registration page (i.e.- The session is scheduled to start at 11am but does not say started on the registration page till 12pm), make sure that DST is checked off in your profile.
-
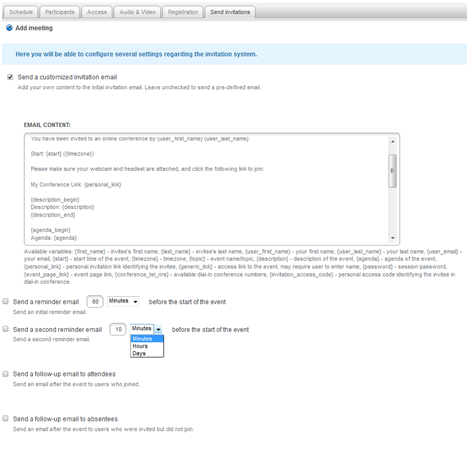
All invitation, reminder and follow-up emails can be edited and customized in the “Send Invitations” tab. You will also have an assortment of variables for custom templates that can auto fill content.
-
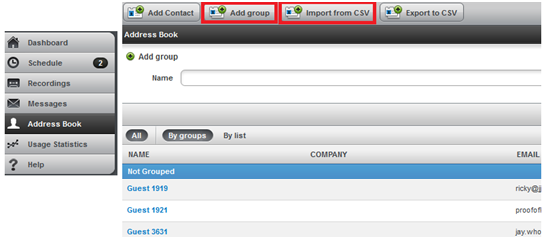
Create groups in your address book to quickly and easily invite multiple people. You can also import CSV lists directly into your address book.
Reporting:
Create groups in your address book to quickly and easily invite multiple people. You can also import CSV lists directly into your address book.
- Once your report has been exported from the Onstream Webinars platform, you can import it into Microsoft Excel.
- To import your Onstream Webinar CSV report back into Microsoft Excel, click on Data (in Excel), then click the From Text button in the Get External Data menu. This will bring up the Text Import Wizard.
- First, make sure you select Delimited. Then you can also select which row you would like to start from.
- Second, make sure you check the box next to Comma. This will then show your data in columns at the bottom.
- Furthermore, if you click the check next to Space, it will divide the address column into two lines, in this example.
- Lastly, choose the format of the data, such as numbers, text, or dates. After you’ve done that, just click Finish and the data will be imported into your spreadsheet. Depending on how big the .CSV file is, the import process could be instantaneous or take several minutes.
Submitting a support request:
Please be advised as to the process set forth by the Onstream Webinars support team for any support issues that we may encounter:
Submit all information to webinars@onsm.com.
- When submitting a support request, provide a detailed description of the problem, while keeping the email specific to that individual issue (not submitting multiple issues per email). Detailed information should include: OS version and type, browser version and type, any error messages that are being displayed, if is it a recurring issue, has the prospect attempted restarting the meeting/browser/computer (in that order), if the issue can be replicated on another machine.
- Provide a screenshot of the problem. This will help the Support team see exactly what the individual is seeing and will help eliminate the initial back-and-forths and help support you and your clients faster and more efficiently, right out of the gate.
- Provide a bullet list of all steps required to reproduce the problem.
If the Support team is unable to reproduce the problem independently, the process is as follows:
- If reproduction of the problem by the support team is not possible, remote access to the problem machine in question will be required.
- If the issue still cannot be reproduced, then the support team will join a session with the partner/client at the next available time.


